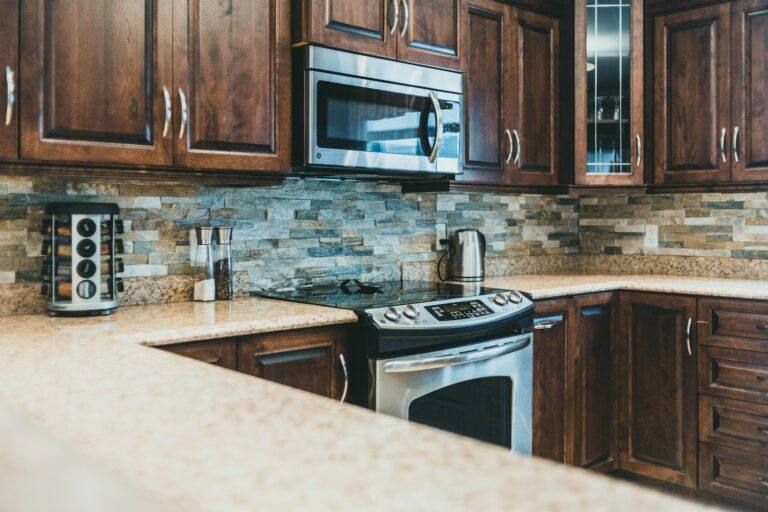
How To Install Crown Moldings On Kitchen Cabinets?
Are you looking to add a touch of elegance to your kitchen cabinets? Crown moldings are the perfect solution! Not only do they add a decorative element, but they also cover up any gaps between the cabinet and ceiling. In this article, we will guide you through the steps on how to install crown moldings on kitchen cabinets, so you can achieve a professional-looking finish without breaking the bank.
Step-by-Step Guide to Install Crown Molding on Kitchen Cabinets:
- Measure the length of the cabinets where the crown molding will be installed.
- Cut the crown molding to size using a miter saw.
- Apply adhesive on the back of the crown molding and attach it to the cabinets.
- Secure the crown molding with a nail gun.
- Fill in the nail holes and seams with wood filler.
- Sand the crown molding and cabinets until smooth.
- Paint or stain the crown molding and cabinets to match.

How to Install Crown Moldings on Kitchen Cabinets?
Crown molding is a beautiful finishing touch that can add character and elegance to your kitchen cabinets. If you’re considering adding crown molding to your cabinets, the process may seem intimidating, but with the right tools and some patience, it can be a simple DIY project. Here’s how to install crown moldings on kitchen cabinets.
1. Gather the Necessary Tools and Materials
Before you begin, you’ll need to gather the necessary tools and materials. You’ll need a saw, a nail gun, a level, wood glue, and crown molding. It’s important to choose the right size and style of crown molding for your cabinets. Measure the length of your cabinets and choose a molding that is slightly longer to allow for cutting and fitting.
Once you have your tools and materials, you’re ready to begin the installation process.
2. Measure and Cut the Crown Molding
Measure the length of your cabinets and mark the crown molding accordingly. Use a saw to cut the molding at a 45-degree angle. Make sure to cut the molding slightly longer than the length of your cabinets to allow for fitting.
3. Prepare the Cabinets
Clean the top of your cabinets thoroughly before beginning. Apply wood glue to the back of the crown molding and press it firmly onto the top of the cabinet. Use a nail gun to secure the molding in place.
4. Attach the Remaining Pieces
Measure and cut the remaining pieces of crown molding to fit around the corners of the cabinets. Attach the pieces in the same way as the first piece, using wood glue and a nail gun to secure them in place.
5. Fill the Nail Holes
After the crown molding is installed, fill any nail holes with wood filler. Sand the filler down until it is smooth and flush with the molding.
6. Paint or Stain the Crown Molding
Once the wood filler is dry, you can paint or stain the crown molding to match your cabinets. This will create a seamless and polished look.
7. Clean Up
Clean up any sawdust or debris that was created during the installation process. Use a vacuum or damp cloth to remove any dust or debris from the area.
8. Benefits of Installing Crown Molding on Kitchen Cabinets
Adding crown molding to your kitchen cabinets can provide several benefits. It can add a touch of elegance and sophistication to your kitchen, making it feel more luxurious. Crown molding can also help to hide any gaps or imperfections between the cabinets and the ceiling, creating a seamless and cohesive look.
9. Vs Hiring a Professional
While it is possible to install crown molding on your own, hiring a professional can save you time and ensure a high-quality result. A professional will have the experience and tools necessary to complete the job efficiently and effectively, while also ensuring that the crown molding is properly aligned and secured.
10. Conclusion
Installing crown molding on kitchen cabinets can be a simple and rewarding DIY project. By following these steps and taking your time, you can create a beautiful and polished finish that will add character and elegance to your kitchen. Whether you choose to do it yourself or hire a professional, crown molding is a great investment that can enhance the look and feel of your kitchen.
Frequently Asked Questions
What tools do I need to install crown moldings on kitchen cabinets?
To install crown moldings on kitchen cabinets, you will need a few tools such as a miter saw, a nail gun, wood glue, and a measuring tape. A miter saw is used for cutting the moldings at the correct angle, while a nail gun is used to attach them to the cabinets. Wood glue is used to reinforce the bond between the moldings and the cabinets, and a measuring tape is used to ensure that the moldings are cut to the right length.
What type of crown molding should I use for my kitchen cabinets?
There are many different types of crown molding available, but when it comes to kitchen cabinets, it is best to choose a material that is durable and can withstand moisture and heat. Some good options include hardwood, PVC, and polyurethane. Hardwood is a classic choice that adds a touch of elegance to any kitchen, while PVC and polyurethane are low-maintenance and easy to clean.
How do I measure the length of the crown molding for my kitchen cabinets?
To measure the length of the crown molding for your kitchen cabinets, start by measuring the length of each section of the cabinet that will be covered by the molding. Next, add all of these measurements together to get the total length of the molding needed. It is a good idea to add a few extra inches to this measurement to allow for any mistakes or changes in the design.
What is the best way to attach crown molding to kitchen cabinets?
The best way to attach crown molding to kitchen cabinets is to use a nail gun and wood glue. First, apply a thin layer of wood glue to the back of the molding. Next, position the molding on the cabinet and use the nail gun to attach it securely. Be sure to place the nails in inconspicuous locations, such as at the top of the molding where they will be hidden by the ceiling.
Should I paint or stain my crown molding for my kitchen cabinets?
The decision to paint or stain your crown molding for your kitchen cabinets is a personal one and depends on your design preferences. Painting is a good option if you want to add a pop of color to your kitchen, while staining allows the natural beauty of the wood to show through. Keep in mind that if you choose to stain your molding, you will need to apply a protective sealant to prevent damage from moisture and heat.
Installing crown moldings on kitchen cabinets is a simple and effective way to add a touch of elegance and sophistication to your kitchen. With the right tools and materials, you can easily complete this project in a few hours.
Remember to measure and plan carefully before you begin, and use a high-quality adhesive to ensure a strong and lasting bond. With a little patience and attention to detail, you can transform your cabinets into a beautiful and functional focal point for your kitchen.
So why wait? Start your crown molding installation project today and give your kitchen the stylish upgrade it deserves!